Tools of the trade:

 Pretty pigments! All Madd Style Cosmetix of course! Starting at the top pot then left -right : New Piggie "Thunder Snow" (a white with golden glitter), "Glitter & Doom" (a dark purple with tons of rainbow glitter), "Stargazer" (a white with bluish/purple duochrome.), New Piggie "Phantasm" (a beautiful pinkish purple with rainbow glitter), New Piggie "Kitty Wompous" (a black base with royal purple & royal blue glitter), "Ol' 55" (the perfect aqua color!).
Also you will need some of Madd Style's Awesomesauce. It is a magic liquid that is from the genius mind of Mo, the creator/owner/queen of MSC! Awesomesauce can be used for multiple purposes...as a foiling medium for eye shadow, an adhesive for glitter, a lip plumper (YES!), it does your laundry...well no actually it doesn't do your laundry, I just wish it did. :( But it does a whole hell of a lot of other stuff for a little tube of awesomeness!
 Brushes! I always make it a point to have several brushes of varying sizes, fluffiness, usefulness etc. The main brushes I use are a Sonia Kasuk travel size which included a large eye shadow brush, an angled shadow brush, a medium size crease brush, a sponge (which I don't use like evahhh) and a smudger (which I use sometimes). Those are the ones on the left all in white. Good quality brushes considering I paid like $20 for the whole set at Target. Score! The ones on the right are various Avon, Lancome, Bare Minerals brushes I've accumulated. Each one has a purpose and each one will most likely get used.
  Tape. Yes tape. Don't ask just yet. Just wait for it. Waaaaait for it.
  One very silly nekkid, clean face. I didn't go all out and put on the moisturizer, concealer, powder foundation blah blah blah that I usually do because my focus today will be my eyes. So deal with the greeeeeziness that is my face. I promise to throw on some powder at the end so as not to unnerve anyone. I'll also fill in my eyebrows, because they are all sorts of wrong.
Here comes the good stuff...

Soooo... remember the tape? Bust that out baby! Cut yourself off about 1-2 inches of tape and apply it as I do in the middle picture. You want one end to start at the outer corner of your eyelid and go on an angle up towards where your eyebrows end. I know it doesn't look like it yet, but trust me my eyebrow ends there. ;) Your eye should look like mine in the last picture, UDPP blended out and your tape applied.

Check out the first picture, add some of the NYX Milk Jumbo Eye Pencil in "Milk", applied the same way as the UDPP. Just put a dot of white in the center of your lid and blended it out until it covers the entire lid, crease and upwards toward the brow...blending all the way til its even. Get an angle eyeshadow brush and put some of the NYX "Milk" on the tip (check out in pic 2 my MSC pin in the background which is pinned to my brush case. Shameless plug.).
Brush on the NYX "Milk" just under your eye. The purpose of adding the white above and below is to help the pigment colors really POP and also to help the pigments/glitter stick to your eye. Again, be SPARING because too much can cause creasing. Of course once you're done with this part, step back and make a silly face. You've earned it. Egads I look like Joan Rivers on crack.

On to serious business! Grab your small shadow brush and load it up with "Phantasm". Start at the inner corner of your eye and TAP the color on. Because these pigments are so glittery, you want the glitter to stick so tapping is your best bet for the best color/glitter payoff. Keep going back for more pigment if you want bolder color, the best part of the MSC pigments is that they are buildable.
Next, apply "Phantasm" to the outer corner of your eye with the same patting motion. If you end up going up onto the tape that's fine. In fact...do that so you ensure good coverage. Trust me.
Lastly, sweep your brush across your lid's natural crease, connecting the inner and outer corner "Phantasm". I like to kind of feel for the natural curve of my eyeball under the lid...it feels a little creepy but its the best way to connect those two color-dots just over your lid.


Time to fill in that lonely lid. Don't worry lid, you'll be all glittery soon too. Get your large eyeshadow brush and dig into that "Ol' 55". Pat the color on filling in all that empty space. Don't worry if you overlap slightly onto "Phantasm" in the corners. You want to keep "Ol '55" situated on the center of the lid blending out slightly. "Phantasm" should still be visible on the outer corners.

To create an awesome shadow and a little bit of drama to your look, (who doesn't love drama? Well, only if it's on your eyes.) take your crease brush and pick up some "Glitter and Doom". Since "Glitter and Doom" is SO glittery, a brush with shorter, stubbier bristles is always better for holding onto that precious sparkle. PAT onto the outer corner. In fact, it should almost a a pushing motion of the brush...pushing the bristles gently onto the surface of your lid. You're going to be "Bob Ross-ing" it a bit here....you know, like when you watch Bob Ross paint and he does all that awesome background landscape and then out of nowhere decides to shove a HUGE tree in front of it all? OK good, I'm glad you're coming along with me on this. :D You're going to slightly be covering up some of that "Phantasm". Don't fret, there will still be blendy goodness showing up so it won't be completely gone.
Without picking up any more new makeup onto the brush, just start blending outwards towards the crease just above "Phantasm". Try to keep the round shape of your blending to match arch of your eyebrow as in the last picture above. Leave yourself about a brush-width of empty space above that. That space is for good goodness to come!

And now the highlight of our tutorial! Ppppbbbttt LAME! :P Wow that was bad. It's actually just time for the highlights. ;) This is really going to draw attention to the high and shallow points of your eye and the light will just bounce right off beautifully. For the browbone, get a fluffy medium shadow brush and dip into your "Thunder Snow". Sweep it just under your eyebrow on the bone focusing in the arch area. Blend blend blend!!! Blend down, around...soften up that line of "Glitter and Doom" a bit. Keep adding "Thunder Snow" because you definitely want the white to show up, and not just have a "Glitter and Doom"/"Thunder Snow" light purple mix. That white should really pop!
For the duct area, grab another small shadow brush and get your "Stargazer". No need to go nuts here, just a little dab or two of "Stargazer" in the duct will really make your eyes stand out.
Uh oh, I need a second. Hold up...
 Time to feed my son! Sorry kiddo I didn't forget about you!! Mommy just wanted to look super pretty for you while you spit Apricot/Sweet Potatoes at me. :)
OK where was I....oh right.

Using your angled shadow brush, get some "Ol' 55" and make a thin line of color under your eye following the same pattern above. Then, take your "Glitter and Doom" and edge the lower corner of your eye to mirror the upper part. You want your lower lid to resemble your upper color scheme only thinner. I also added some more "Phantasm" to the lower inner corner, to remain consistent.
After your shadows are done and you're pleased with your spectacular work, put on your favorite mascara. I'm using Avon's waterproof Super Full in black. Meh, I used to sell Avon so it's what I got. Aspiring for bigger and better things tho. I prefer Lancome's Hypnose. Totally fab stuff!
OH YEAH and guess what it's time for?? That's right, peel the tape off your face! As you can see in my third picture...it creates a nice crisp line! Pretty neat huh? Thanks Krissi Sandvik for the tip! :D

To complete the look, I use a basic black pencil liner (the kind I used was an Avon black pencil liner) to fill in the lower waterline (the inner part of your lower lashline). You can see the completed look below with the lower black line filled in.
And now please enjoy some gratuitous shots of me modeling my sweet makeup job thanks to Madd Style Cosmetix!
 It's MEEEEE!!! See, I promised I'd fill in my eyebrows! I used NYX powder eyebrow kit in Blonde 06 (a review on that to come!) and Stila's Lip Glaze Stick in Grapefruit. This was taken in sunlight.
 Boy, do I look PISSED! Nahhhh... I just make that serious face so my eyes won't crinkle if I smile! If I was ever that serious I think I'd have to kill myself. ;)
 The finished product! Taken indoors with camera flash. In this one you can really see "Stargazer" in the duct! I chose it because it has that blue duochrome, which I think fits really well with the "Ol' 55" and the other color choices too.
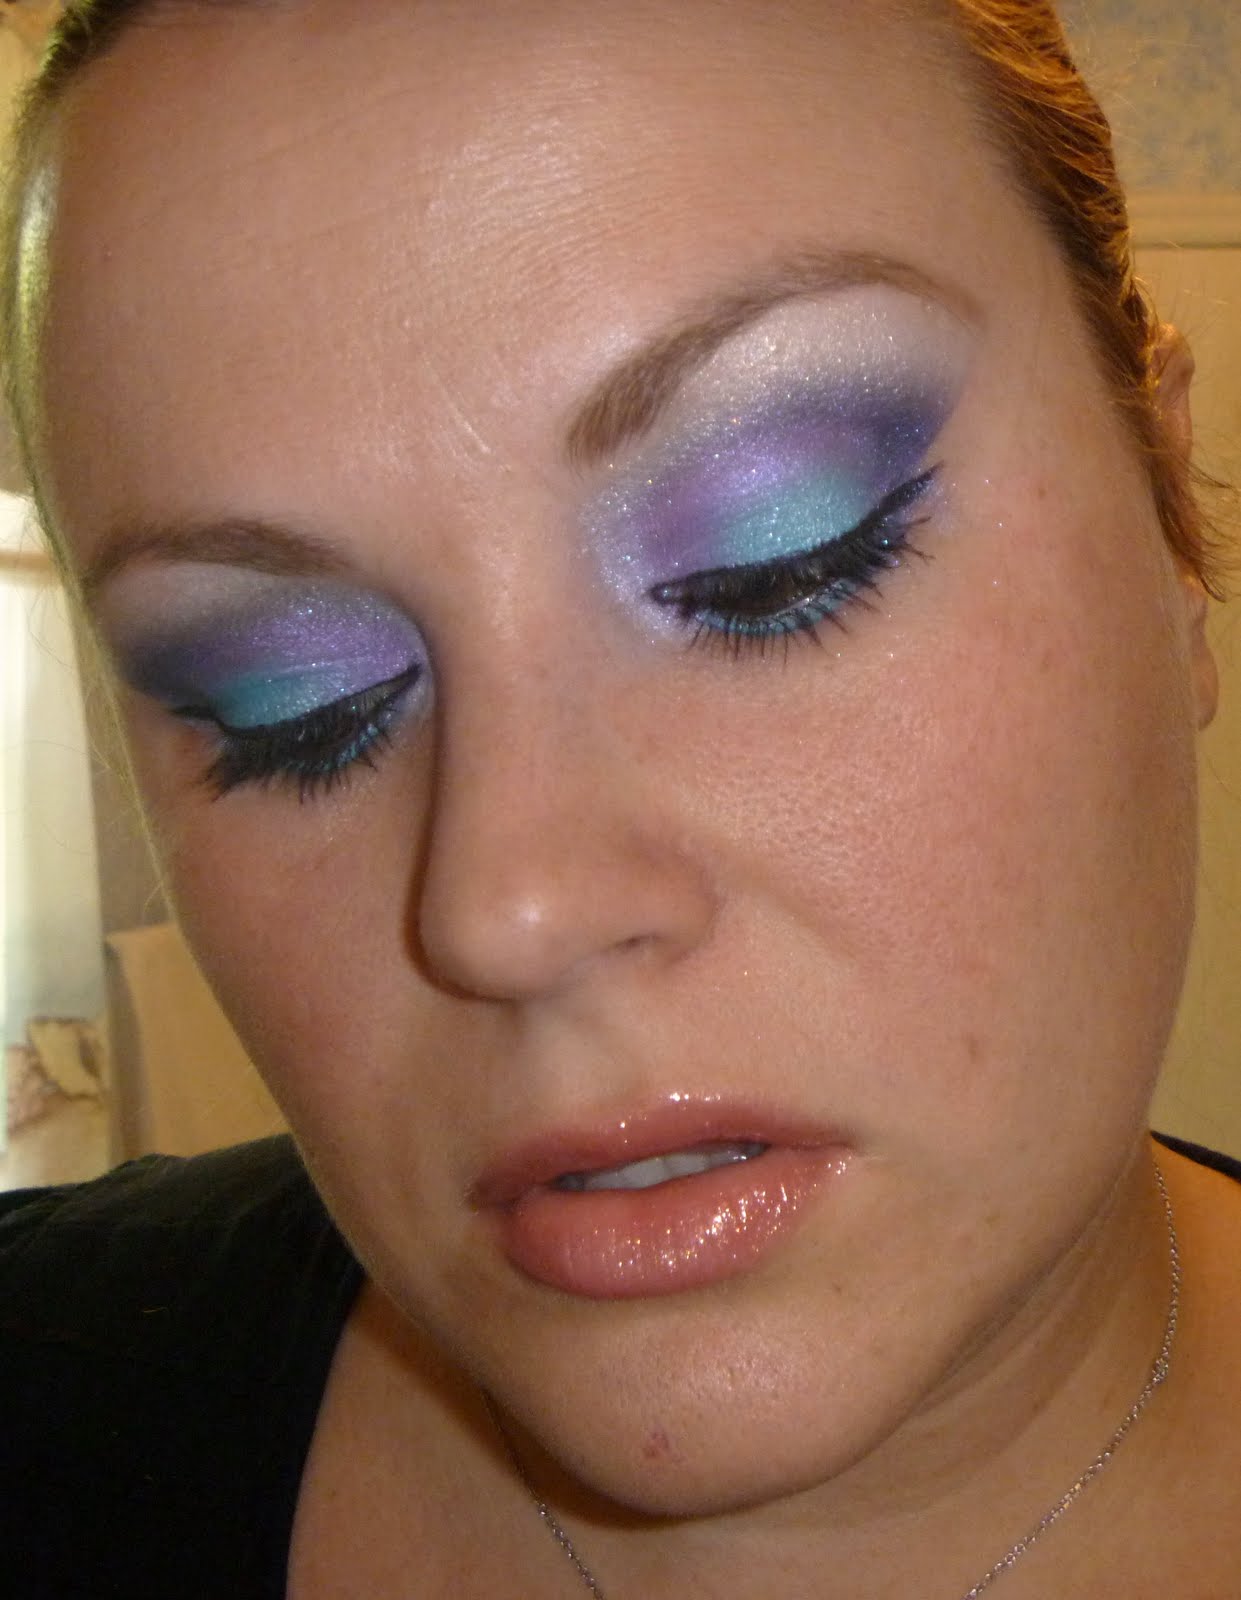 Indoor pic with flash of mah whole face, so you can get an idea of the color placement.
Annnnnd one more crazy closeup in natural sunlight no flash. Woo hoo!
Thanks for checking this out and feel free to comment any questions. Feedback is welcomed as well! Much love!!! xoxoxoxo

I loooove this, Chrissy! The Ol'55 on your lower lashline really makes the whole thing just pop like crazy!! Great job!!!
ReplyDeleteGREAT job and very informative! I love all the details and your sassiness :D
ReplyDelete